
03-05-2011, 12:00 AM
|
 |
Super Moderator
|
|
Join Date: Mar 2011
Location: NoVA
Posts: 3,212
|
|
 HOW TO: Relocate AWC button to the dash
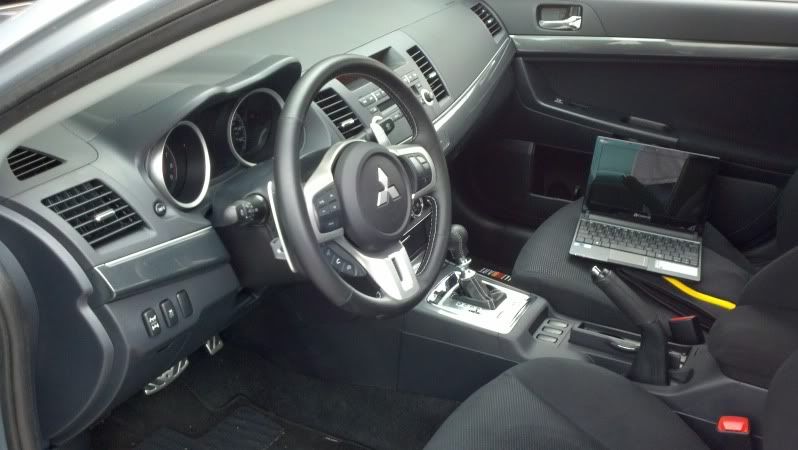
I take no credit for this modification as it was done by "tjwphoto" on EvolutionM.net. I brought up the idea but he carried it out. This is a good mod to do if you're annoyed at only having the one button sitting below the shifter out of three possible buttons, and having an extra slot or two open up where the TCS button on the dash is located. You could relocate the AWC button up there and replace the blank buttons with the OEM cubby tray that comes on the standard Lancers to hold a phone or iPod or whatever. This guide is word for word by "tjwphoto".
Part 1 of 3:
Quote:
Originally Posted by tjwphoto

new thread for search purposes
Took me about 2 hours; with instruction maybe less
Tools required. Knife, Phillips screw driver, thin flathead to pry, 10mm socket, cutter
My vocabulary may be incorrect because I have no auto background but deal with it. Also this is how I did it, there maybe be an easier way but also deal with it
First step, pop out that awc box with a knife or something strong and thin and unhook the wire harness, also take out the awc button from the box and save it for the dash location, simple process just look at it

Using a 10mm socket, take out bolts inside the center console so you can remove this later. With a very thin flathead, thinner the better, pry up on the plastic cover for the cupholders area or whatever it is to dismantle the center area. see next step.

Pushing toward the cup holders where my fingers are, then sliding them under allows you to grab and pull upward to unhook some of the plastic clips, work this piece loose and take it out.

|

|
03-05-2011, 12:01 AM
|
|
Super Moderator
|
|
Join Date: Mar 2011
Location: NoVA
Posts: 3,212
|
|
Part 2 of 3:
Quote:
Originally Posted by tjwphoto
Unhook the button that holds the shift cover A, and B take the shift knob off.

Then C. pull up on the shifter area and work with it to loosen it free,

Then you can pull it over and let it hang, I did not unhook any wires, just let it hang there. Remove screws in the photo to remove more plastic on the console

Pull out the whole pastic covering off the center console. This allows you to get your fingers in the tight spots and gives you more space, this step may be avoidable but it worked well for me. this is a repeat photo.
 |
Last edited by BravoZero; 03-05-2011 at 12:03 AM.
|
03-05-2011, 12:01 AM
|
|
Super Moderator
|
|
Join Date: Mar 2011
Location: NoVA
Posts: 3,212
|
|
Part 3 of 3:
Quote:
Originally Posted by tjwphoto
Take out screws 1, 2, and 3. Open the fuse box and pull on that piece and work it loose until that piece hangs free from the top but still is connected from the bottom. The knee airbag piece stays where it is, I was cautious around the airbag.

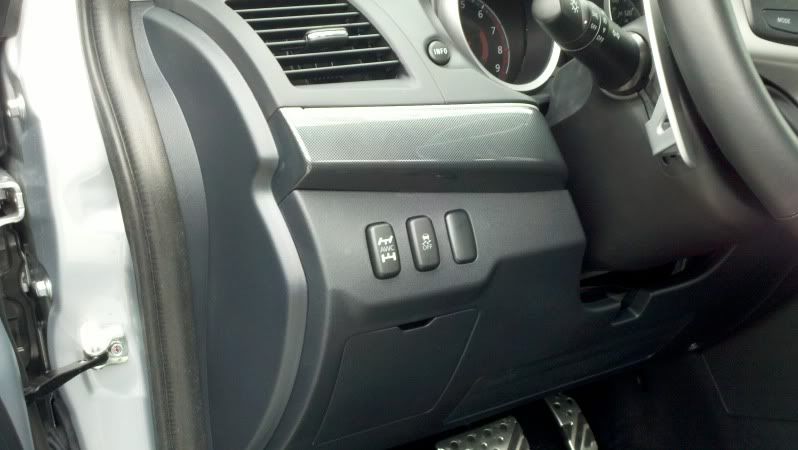
Take out a blank button, I used the one on the right because of; (question for anyone: what is connected to the blank button on the left here in my photo??)

Then you have to free the awc wires from the rest of the wires for the center console, which means for at least the 2011, I had to cut these ziptie wire holders which were a pain because you have to be very careful and they were in difficult spots. There were 3 I think. You will then have to free them of electrical tape and you have to get it free enough to bring the wires over to the left part of the dashboard. Didn’t really take detailed photos here but you can easily figure it out. Bring the wires over and connect that awc button to the dash location. Once you get that far I think you’ll easily manage assembling everything back together


hope that works for everyone.
cheers |
|
03-05-2011, 03:32 AM
|
 |
Senior Member
|
|
Join Date: Jun 2010
Location: Downey, CA
Posts: 1,367
|
|
this is a good find...
|
03-05-2011, 03:27 PM
|
|
Super Moderator
|
|
Join Date: Mar 2011
Location: NoVA
Posts: 3,212
|
|
I did this today and was successful, very easy to do just time consuming. I relocated mine to the left of the TCS instead because it's easier to see and get to while driving, and from where I sit I can see both buttons.
|
03-05-2011, 11:57 PM
|
 |
Senior Member
|
|
Join Date: Dec 2010
Location: Vacaville, CA
Posts: 119
|
|
Good info! I have been thinking about doing this, but I really wanted to move the TCC to the center console. I'm thinking the wires are not long enough, but have yet to look into it.
|
03-07-2011, 06:02 AM
|
 |
Senior Member
|
|
Join Date: Jun 2010
Location: Winnipeg, Manitoba ,Canada
Posts: 1,283
|
|
Any advice on how to properly take out the blank to the right of the ACS button as I want to put in a rocker switch for my new LED interior lights.
|
03-07-2011, 08:16 AM
|
|
Super Moderator
|
|
Join Date: Mar 2011
Location: NoVA
Posts: 3,212
|
|
Quote:
Originally Posted by Jackal
Any advice on how to properly take out the blank to the right of the ACS button as I want to put in a rocker switch for my new LED interior lights.
|
You need to remove that knee panel from the dash and expose the back of the buttons, they are mounted to a white plastic frame screwed onto the panel by three screws, two at the top and one at the bottom. Unplug the TCS button and remove the screws, that will free the plastic frame with the three buttons. The blanks are tricky to remove, take a small thin screwdriver and pry the clips while pushing the blanks backwards and it will pop out.
|
03-07-2011, 11:38 PM
|
|
Senior Member
|
|
Join Date: Jun 2010
Location: Winnipeg, Manitoba ,Canada
Posts: 1,283
|
|
Ok maybe I should clearify I am 6 ft 1 inch tall and 270 lbs I have a 50 inch chest and a 19 inch neck and a pumpkin for a head LOL !
I don't exactly fit into the footwell and I am not removing my drivers seat to do this. I can't get my hand through the fuse door to see or feel the back of the blank. So what are my options and pry what clips which way from the back the front left right up down?????
Any help would be appreciated. My final option would be to simply use a dremal and cut out a rectangle opening into the blank to sit a blue glow rocker switch into the blank. I have the wiring ready to go.
Sorry it just gets frusterating when these tiny little 165 lb guys are like you just do this and this its easy. It is if you can fit into the work space or can actually squeeze your head into a tight spot to see which clips need to come off etc.
|
03-08-2011, 06:57 AM
|
|
Super Moderator
|
|
Join Date: Mar 2011
Location: NoVA
Posts: 3,212
|
|
Quote:
Originally Posted by Jackal
Ok maybe I should clearify I am 6 ft 1 inch tall and 270 lbs I have a 50 inch chest and a 19 inch neck and a pumpkin for a head LOL !
I don't exactly fit into the footwell and I am not removing my drivers seat to do this. I can't get my hand through the fuse door to see or feel the back of the blank. So what are my options and pry what clips which way from the back the front left right up down?????
Any help would be appreciated. My final option would be to simply use a dremal and cut out a rectangle opening into the blank to sit a blue glow rocker switch into the blank. I have the wiring ready to go.
Sorry it just gets frusterating when these tiny little 165 lb guys are like you just do this and this its easy. It is if you can fit into the work space or can actually squeeze your head into a tight spot to see which clips need to come off etc.
|
I almost fit that category... 5'7" and 170, lol.
The easiest way to get back behind the fuse door is by removing both screws from the bottom of the knee panel, down near the OBDII port and the center console. That will enable you to move it, then very carefully start prying the panel downwards starting where the climate thermostat thing is next to the steering column, near the ignition. Be careful of the knee airbag, it's stationary so don't try removing it. Make your way over to the door and it will eventually come off, just held in by a few clips. Hope that helps.
__________________
-2014 Ford Focus ST///2.0L EcoBoost, 6 speed manual, ST3 package, Ingot Silver Metallic
-2011 Mitsu Lancer RALLIART "Veronica" (RETIRED)
|
 Posting Rules
|
You may not post new threads
You may not post replies
You may not post attachments
You may not edit your posts
HTML code is Off
|
|
|
All times are GMT -7. The time now is 08:59 PM.
|
|


 Linear Mode
