Another update and here is the story. I bought the Evo X bezel to install and let's just say it turned into a 12 hr project day. The front end was off in 15 minutes but after removing the crash beam and finding out it was an engineered double boxed beam with only about an inch or so in between boxed section and after trying to cut out a big enough piece with a 5 inch grinder that I used up 4 grinding discs and my dremal which I used up 13 disks and spent hours on it to no avail. I contacted an old college buddy I took mechanics with back in 1990 and took with piece out to his farm just outside the city. He then got out his oxy torch and cut the whole thing out in 6 minutes. My advice to anyone doing this mod is to simply take the beam to a shop or a friend who has access to a cutting torch and have them cut out the entire section of the inside leaving only the metal making up the bottom plate and the top plate.
I had my friend leave about a 1/2 inch at the top and bottom. big mistake. Lets just say I end up putting my crash beam and front end on and off about 4 times each during the process only to find something was still visable through the new slots. So back to the grinder to cut away that 1/2 inch on top and bottom check fitment again on car put skin on again to verify then take it all off again to paint beam and foam piece after cutting it out using beam cutouts as reference.
Another thing is once you have the front end skin cut out and bezel installed you need to silicone in place and put front end facing down on something clean I used microfiber sheet over stacks of tires then put a 2x6 board across tires lined up with center of bezal make sure you put micro fibre cloth on 2x6 then use some weight. I used 4 litre container of anti freeze to apply pressure on bezel through to 2x6 while silicone set up. The little plates that come with the bezel only hold the ends so the center tends to pop forward a 1/4 inch in the middle. Apart from the extra time it took to realize a grinder and dremal tool just would not get the job done and a little trip out to the country to finish that task well not quite and the extra time waiting for paint to dry , silicone to set up it wasn't too bad.
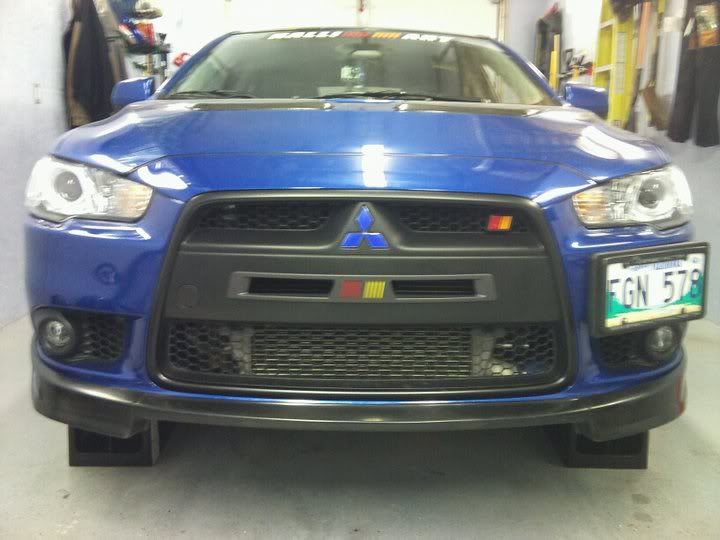
I learned a lot and overall I had a great day and had a buddy I usually go crusing with give me a hand. You can do this project by yourself it's just a lot easier having someone help you out. I am glad I waited and bought Drew's custom bezel instead of buying some pc of crap off ebay. I used red and yellow electrical tape behind the ralli art slits in the piece, don't know how long it will last , but I love the look. Hope you will too!
P/S Also primed and painted trim ring, did not take my time due to it being windy and rainy off and on the whole day.
Now for a few pics.
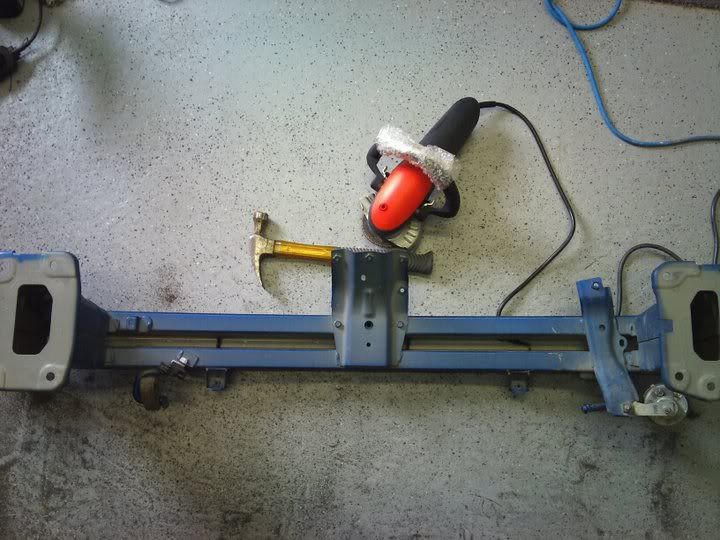
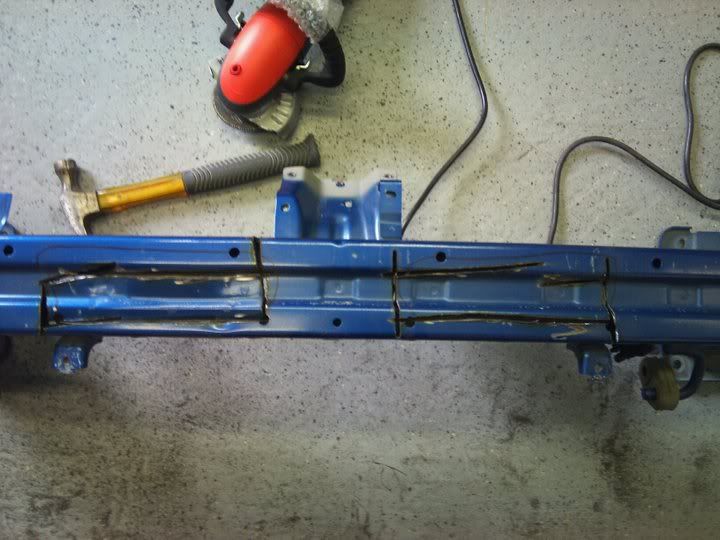
Will post more pics when my buddy sends me the pics off his phone, I did almost all the work he took almost all the pics so hopefully I will get them soon. I know the grinder marks ar all crooked but once it starts cutting you cant see anything and the solid steel boxed sections also run front to back behind the front skin and when you hit it , it defects the grinder because it wants to take the path of least resistance or in this case less steel. LOL !


 Linear Mode

